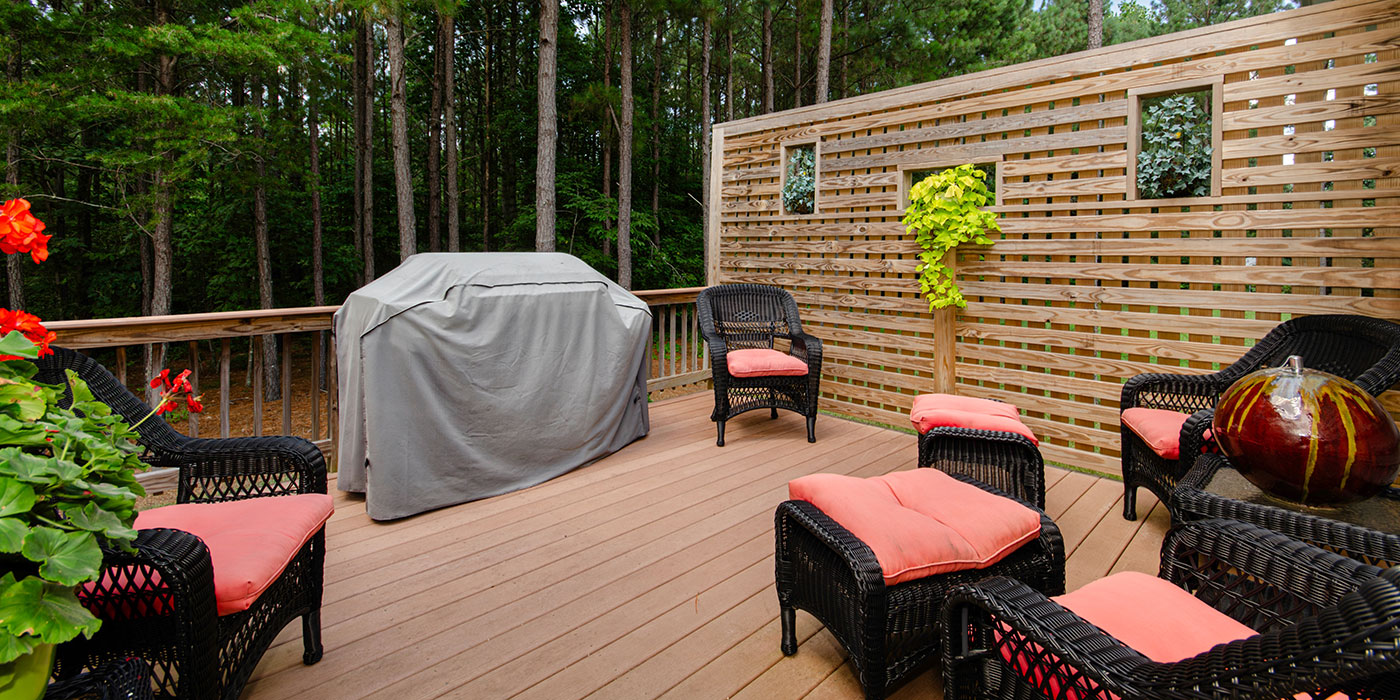
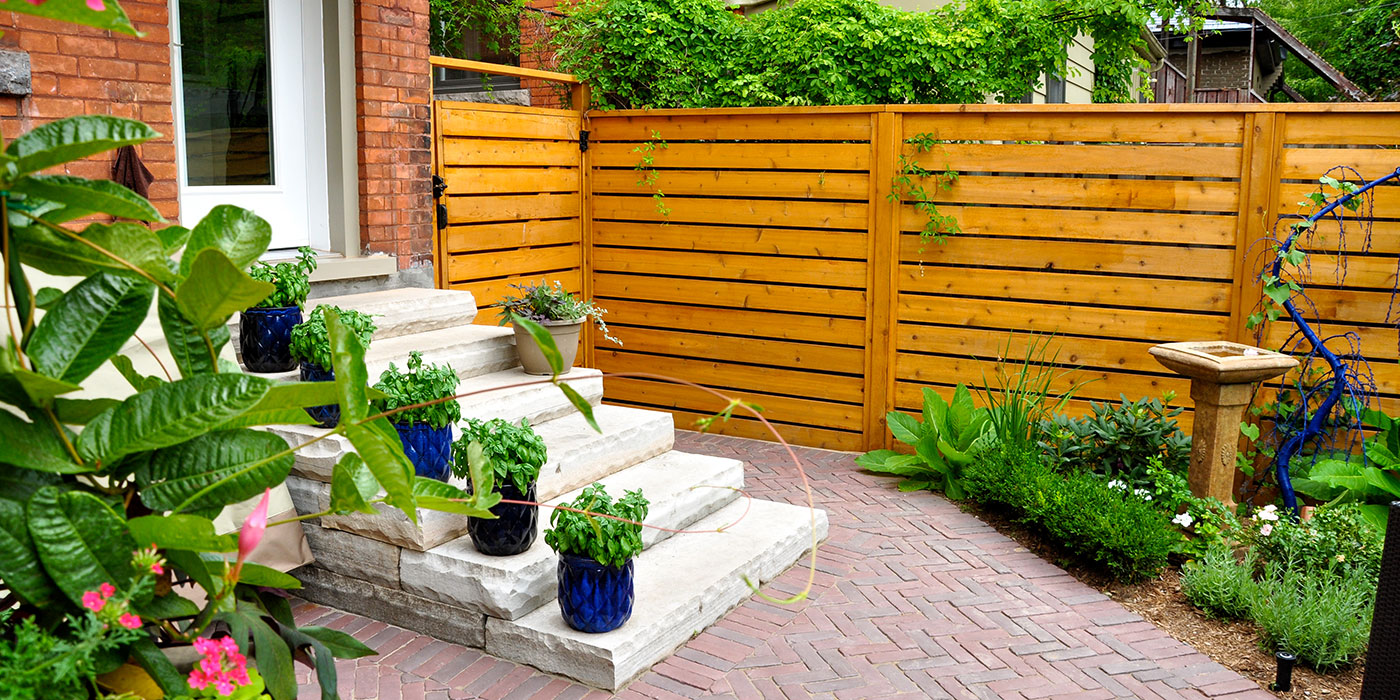
Privacy has become one of the most valuable outdoor upgrades you can make in 2026. For smaller backyards, adding privacy panels can make the space feel secluded; in larger backyards, adding them to areas of your entertainment space can further define a conversation zone.
You don’t need a full backyard rebuild to make vertical upgrades that will transform your deck. By adding in simple vertical elements, like a modern horizontal slat panel, you can block sightlines, cut wind and instantly elevate the look of an existing deck. This type of project delivers a big impact with relatively simple tools and materials. Read on for the seven steps to achieve peak privacy this entertaining season.
Step 1: Perfect Your Plan
As with any project, be sure to develop a solid plan. Below are some other must-know items to keep in mind during the planning process:
- Locate Your Lines: Never guess your property line. Hire a surveyor or find your property pins. Building two inches onto your neighbour’s yard can result in a court order to tear the whole thing down.
- Call Before You Dig: Getting utility locates is free and mandatory. Hitting a gas line will ruin a lot more than just your weekend.
- Check Local Bylaws: Most Canadian municipalities cap residential backyard fences at 6 feet (72 inches). Buildings and other structures might also have a restriction to how close they can be to your property line. Check your local codes regarding height and “good neighbor” rules (who gets the “pretty” side).

Timber Tip
When planning your privacy fence, make sure to keep in mind any future backyard projects that you might be considering. When building solid structures, it’s important to plan ahead since they’re more difficult (and costly) to move.
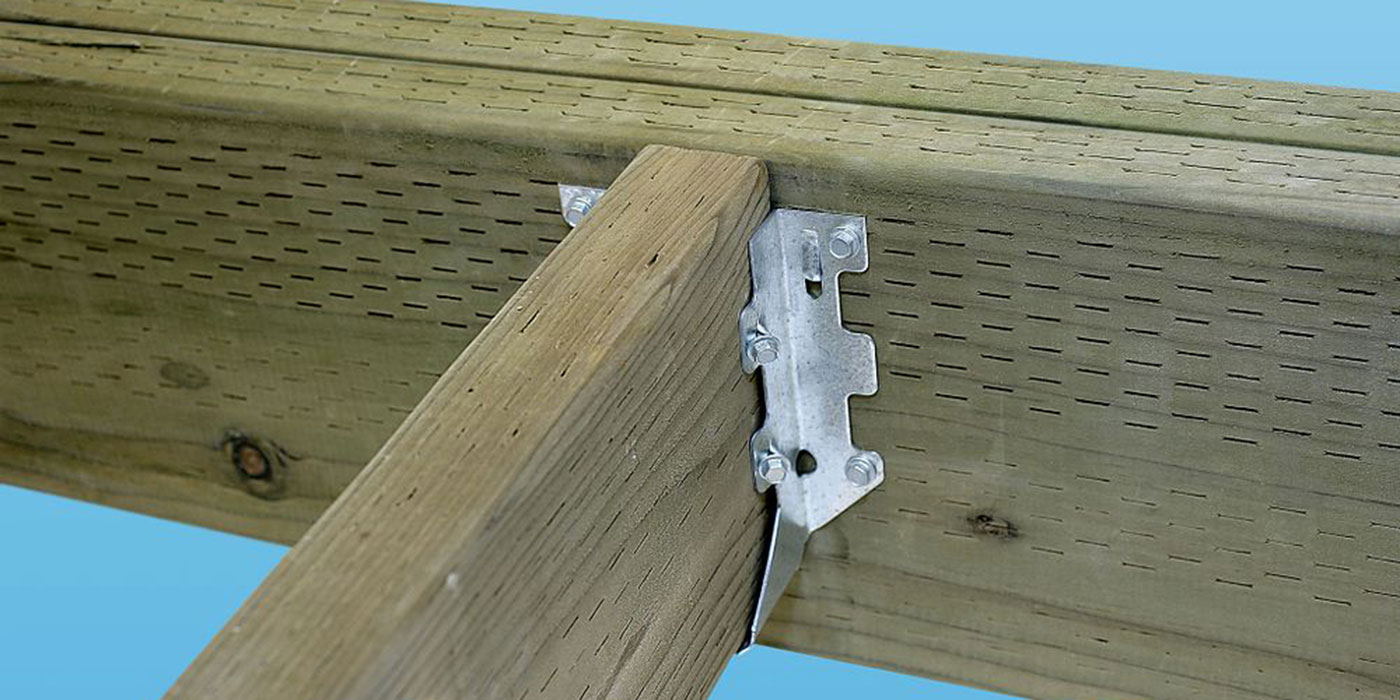
Step 2: Solid Frame
A solid frame starts with a solid foundation. Make sure posts are secured in a solid footing. The depth of the footing should be concrete and reach below the frostline (typically 42”). Be sure to use 4×4 or 6×6 pressure-treated posts, with 6×6 posts being recommended for high-wind areas. For the frame of the privacy sections, we recommend 2×4 boards.
Timber Tip

For extra strength, durability and longevity, we recommend using metal fence brackets attached to your posts. Secure these brackets using Simpson Strong-Tie Strong-Drive SD Connector Screws. They have the strength required to keep that privacy fence standing in all types of weather. Simpson Strong-Tie also has strong matte-black outdoor accents to create a more intentional and well-designed space.
Step 3: Installing the Privacy Boards
Wood swells in the humidity and shrinks in the winter. If you jam your boards perfectly tight together in the dry heat of August, they will buckle and pop off in the damp spring. Leave a tiny gap (the width of a nail) between boards. Keeping a space in between the boards can also allow for a breeze to flow through. This can help keep the structural integrity of the privacy fence over time in high-wind areas, and allow for the added benefit of airflow into the private space.
Incorporating greenery into the design and layout of the fence can help bring a natural essence and warmth into the private space, while also allowing for breezeways.
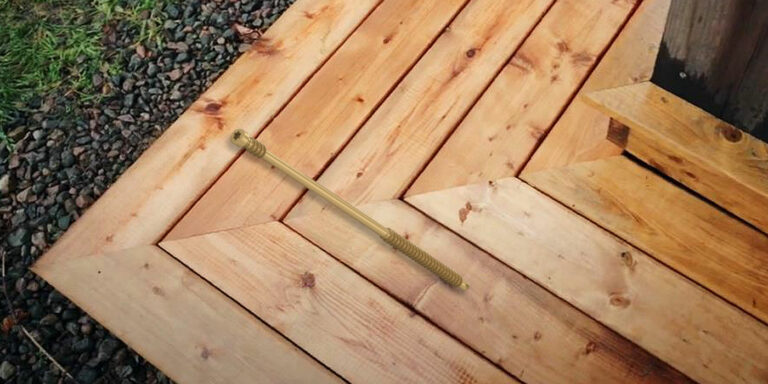
To secure your slats, we recommend using Richelieu PWR-PVH fasteners. These fasteners are designed with aggressive threads that easily pull wood completely flat against the pasts – they are also designed to be installed on a 45-degree angle. Plus, the specialized tiny head sinks flush into the lumber, leaving a virtually invisible hole that gives your privacy fence a flawless, custom-built aesthetic without splitting the planks.
Timber Tip
Use the Makita18V LXT 6-1/2″ Circular Saw to cut slats to a uniform length. The light-weight design makes it easy to cut the dozens of boards needed for the project. Battery-powered is an added bonus, making job sites not only free from tripping hazards but also allowing you to move around the area without worrying about cord length. Follow up with a sander to soften those stubborn edges.
Step 4: Goof-Proof Protection
New wood looks great for about the first year or two before the sun bleaches it to a dull, weathered grey. To prevent greying and other damage from the seasonal elements, be sure to seal the wood – especially the cut ends.
Timber Tip

To ensure full penetration of the wood, we highly recommend applying Rust-Oleum Ready Seal. As an oil-based stain & sealer, it won’t peel or flake off your fence after a harsh winter, and doesn’t need resanding before reapplication (needed every 3-5 years). What’s more, it also has UV and water protection.
Finally, Tips From Our Pros:
- Keep It Off the Grass: Avoid letting your privacy fence boards touch the dirt or the grass. Wood acts like a sponge; if it touches the ground, it will wick up moisture and rot from the bottom up. Keep a 2-inch gap between the bottom of the boards and the soil.
- The “Stepped” vs. “Sloped” Debate: If your yard has a hill, you have two choices. You can “step” the fence panels (keeping the rails level and creating a stair-step look at the top and bottom) or “slope” them (following the contour of the ground). Stepping is structurally easier and usually looks more professional, but you will need to fill the triangular gaps at the bottom (we recommend stonework) if you have small dogs!
If you’re looking to add structure, style and privacy to your outdoor space, now is the time to visit TIMBER MART. From fasteners and finishes to saws and expert advice, you’ll find everything you need to build smarter, cleaner and more confidently – right down to the last slat!